Table of Contents
Introduction to Disk Utility
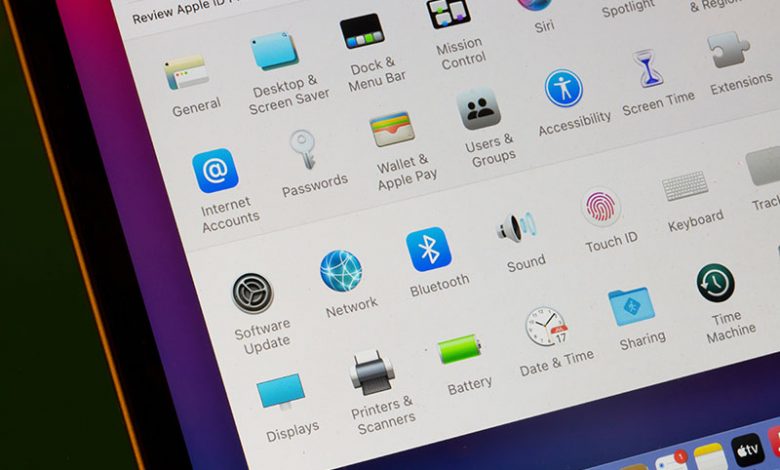
Disk Utility is a built-in macOS tool designed for managing your hard drives or storage devices. This utility is essential for handling tasks like formatting, partitioning, and verifying disk health, troubleshooting disk-related errors, or creating disk images. Strategically located in the Utilities folder within the Applications folder, Disk Utility is quick to access using Spotlight, the macOS search tool, triggered with the Command+Space Bar shortcut. A simple search for Disk Utility will yield the desired tool.
Definition and Location of Disk Utility
The Mac operating system, macOS, features a proprietary tool called Disk Utility. It provides users with detailed metrics about their hard drives or other storage peripherals. Disk Utility is conveniently situated in the Utilities folder inside the Applications folder on your Mac. It can also be quickly retrieved using the Spotlight tool, which is activated by pressing Command+Space Bar simultaneously.
Basic Features and Functions of Disk Utility
Disk Utility serves as a comprehensive tool for managing and optimizing your hard drive. Its defining feature is the display of both overarching and granular details about your drive, including overall capacity, used and free space, and data on the various volumes. It also allows for disk repairing, formatting, and partitioning, with in-depth options depending on the macOS version. Some of the essential features of Disk Utility may vary or evolve through different macOS versions, as observed during the transition from OS X El Capitan to macOS High Sierra and then Catalina.
Accessing Disk Utility
Built into the macOS environment, Disk Utility can be accessed promptly through the Spotlight search tool. By pressing Command + Space Bar, you can trigger the Spotlight tool, type in "Disk Utility", and launch the application from the search results. It provides an immediate method to access this valuable tool without the need to manually navigate through folders.
Features Available in Disk Utility Window
The Disk Utility interface has been designed for easy navigation and comprehensible access to its various features. You can view your hard drive configuration details and a graph showcasing the drive's overall capacity alongside used and free space. The various volumes are also highlighted for a clearer understanding of your drive's organization. Features available on the Disk Utility window range from the basic, such as viewing drive information, to the advanced operations such as formatting, partitioning, volume creation, and repair of boot or startup disks. It’s noteworthy that these options have been updated or redesigned over several macOS versions like El Capitan, High Sierra, and Catalina, reflecting continuous advancement in this utility tool.
Specific Applications of Disk Utility
Among the many features and applications of Disk Utility, some of the key functionalities include diagnosing and fixing startup disk problems, run a complete drive check with First Aid, restoring volumes, and handling unmountable volumes. Each of these functions plays a critical role in maintaining the health and performance of your Mac's disks.
Diagnosing and Fixing Startup Disk Problems
Disk Utility is an invaluable tool when it comes to rectifying startup disk issues. Frequently, issues with the startup disk can prevent your Mac from booting up correctly. By running Disk Utility, users can identify these problems and repair their startup disk, thus ensuring a smooth and uninterrupted boot process. The tool may introduce different repair options depending on the type and severity of the detected problem.
Checking and Repairing Hard Drive with First Aid
First Aid is a significant functionality within Disk Utility that serves to detect and fix potential disk errors. These issues may range from simple formatting inconsistencies to more complex problems like bad directory structures or corrupt data. When run, First Aid scans the entire disk looking for these issues and initiates appropriate actions to resolve them. This feature is crucial for keeping your Mac's performance uncompromised.
Restoring a Volume from Another Volume
Restoring volumes is another noteworthy feature of Disk Utility. It enables users to create exact copies of a disk volume onto another volume. This function is useful when you need to move your data to a new drive or wish to have a backup of your existing data. The restoration process through Disk Utility ensures that every file is copied over, resulting in a complete and precise duplicate of your original volume.
Use of Tool to Unmount a Volume on Hard Drive
Sometimes, it may be necessary to unmount a volume from your Mac's hard drive, and Disk Utility provides a simple and straightforward way to do so. Unmounting a volume can be useful for performing certain disk operations that require the volume to be inactive or for safety reasons when physically removing an external drive. The unmount option in Disk Utility ensures a safe and error-free disconnection of the chosen volume.
Instructions for Using First Aid in Disk Utility
First Aid, a crucial feature in Disk Utility, performs a comprehensive check of your hard drive, identifies underlying issues, and initiates appropriate repairs, all within a few easy steps. Wrapping everything into a straightforward process, First Aid is paramount to maintaining your Mac's performance and drive health.
Opening Disk Utility
Finding and opening Disk Utility is quite straightforward. Open the Finder App, then navigate to the Applications tab located at the left sidebar. Scroll down to find the Utilities folder and click on it. Within the Utilities folder, you'll find Disk Utility. Click on it to launch the application.
Choosing First Aid from Options
Once Disk Utility is open, you will be presented with a series of options on the top-right corner. Among these options, click on "First Aid." This will initiate the diagnostic and repair tool designed to analyze and mend any issues with your hard drive.
Running First Aid and Waiting for Diagnostics
After selecting First Aid, click on "Run" and wait for the diagnostic tool to complete its operation. The process may take some time, depending on the state of your hard drive, during which you will not be able to use your Mac. The scan will carefully analyze the disk directory, detect existing damage, and attempt to repair it.
Follow-Up Actions After Diagnostic and Repair
Upon completion of the scan and repair process, First Aid will provide a summary of the detected issues and the actions taken. If, by any chance, First Aid identifies an issue that it cannot fix, you should backup all your Mac's data immediately. Disk problems that are beyond First Aid's repair capacity suggest a severe issue with your hard drive. In such a case, it would be wise to contact Apple Support for further guidance and necessary repairs.
Advanced Disk Utility Uses
Disk Utility is a versatile tool for handling disk related issues, but it also lends itself to more advanced usage scenarios including functioning in macOS Recovery Mode and in coordination with Terminal commands. This advanced utility can be particularly beneficial when facing complex disk malfunctions that go beyond basic repair mechanisms.
Use of Disk Utility in macOS Recovery Mode
When facing critical issues like a Mac not booting up correctly or the startup disk misbehaving, you can lean on the Disk Utility's functionality in macOS Recovery Mode. While in Recovery Mode, you can access utilities and perform various repair operations to resolve these severe situations. This feature can be instrumental in scenarios where the standard boot process is compromised.
Use of Terminal Commands for Disk Operations
Alongside Disk Utility, Mac Terminal commands are another potent tool for mending disk issues. The Terminal commands enable you to perform low-level tasks and operations on volumes and containers, providing a more comprehensive control over your Mac and its functions. These commands are crucial for users comfortable with handling advanced functionality.
Steps for Using Terminal Commands
To use Terminal commands for disk repair, you need to boot your Mac into macOS Recovery Mode. Then, open the Finder app and navigate to Applications > Utilities > Terminal. Enter 'diskutil list' command, then hit Return. This will present the details of all your internal and external storage devices. Note down the identifier of the disk you want to examine. To verify the status of your disk, you would enter 'diskutil verifyvolume [SSD_ID]' , then hit Return. If issues are found, you can proceed to repair the disk by typing 'diskutil repairVolume [HDD_ID]' and hit Return again.
Dealing with Issues that Disk Utility Can’t Fix
While Disk Utility is a powerful tool, it may sometimes encounter issues beyond its repair capability. In such situations, it's essential to backup your data immediately to avoid loss. Consider seeking further assistance, either from Apple Support or through third-party repair tools available online. Having these alternatives is key to resolving cross-grained issues that need a more in-depth approach.


