Table of Contents
Introduction
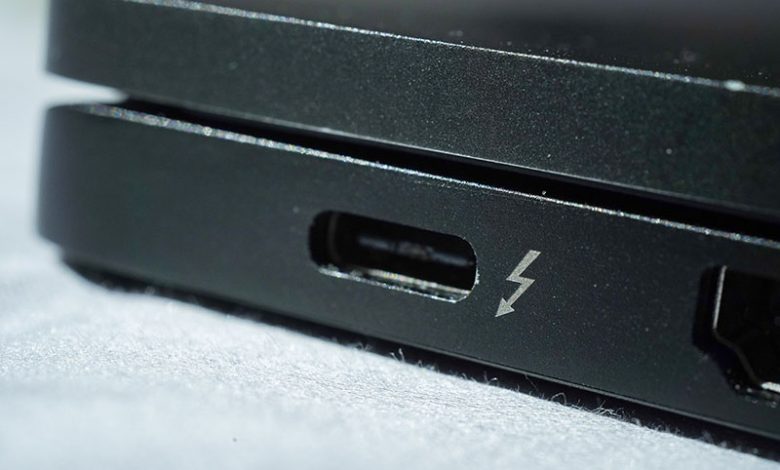
The Thunderbolt port is an advanced hardware interface that allows the connection of various peripheral devices to a computer. This interface combines PCI Express and DisplayPort into one serial signal alongside a DC power connection, offering a unique level of speed and versatility. Users can link multiple devices together, like an external monitor to a laptop, using a Thunderbolt daisy chain. The Thunderbolt technology offers a high level of connectivity, providing users with increased productivity and ease of use.
Explanation of Thunderbolt Connection
Thunderbolt connections are developed by Intel in collaboration with Apple. They are designed to deliver fast, versatile I/O (input/output) performance. Thunderbolt ports support the connection of data devices, displays, and networks through a single compact port. The connection is available via a directly plugged-in Thunderbolt cable or via a Thunderbolt-compatible docking station, allowing the integration of workspace. Suitable for professional and everyday use, Thunderbolt ports deliver the fastest, most versatile connection to any dock, display, or data device.
Utilizing Thunderbolt for Display Connection
One of the many uses of Thunderbolt is to connect an external display to your laptop. You can achieve this by using a docking station or connecting the external display directly using a Thunderbolt-compatible USB C to HDMI converter cable. This setup increases your screen estate, allowing you to manage multiple tasks in different windows simultaneously and effectively.
Problem Statement: Thunderbolt Not Detecting Display
However, it can sometimes happen that your laptop fails to detect the external display through the Thunderbolt connection on Windows 11. This issue is often due to several reasons, such as using an incompatible cable, a broken or damaged cable, outdated firmware of your Thunderbolt controller, or a corrupted display driver.
Failures in Thunderbolt Display Detection in Windows 11
Failure in Thunderbolt connection for display detection can cause a major interruption to your work or entertainment plan. While it may be disturbing, this problem does not spell doom as there are several troubleshooting steps that you can take to resolve the issue. Potential fixes include direct connection (if possible), checking your cables, performing a power cycle, updating your Thunderbolt controller driver, and updating your system BIOS. These possible solutions will be explored in greater detail in the following sections.
Possible Fixes for Thunderbolt Not Detecting Display in Windows 11
In case you are encountering issues with your Thunderbolt device not detecting displays in Windows 11, there are multiple potential fixes you can try. The following sections will delve into these solutions in a more detailed manner.
Checking Your Thunderbolt Cable
The first step in troubleshooting Thunderbolt display detection issues is to examine your Thunderbolt cable. Ensure the cable you're using is compatible with Thunderbolt connection and that it's not broken or damaged. Try using a different Thunderbolt cable to verify whether the problem lies within the cable itself.
Performing a Power Cycle on All Devices
Another method to resolve display detection problems is to execute a power cycle on all connected hardware. Turn off your computer and the external display, then unplug them from their power sources. Wait for a few minutes before plugging them back in and powering them on. This process can help reset the devices and might resolve the detection issues.
Rolling Back Your Graphics Card Driver
Sometimes, the issue might be with the graphics card driver on your laptop. If updates to the driver are causing problems, you could try rolling back to a previous version of the driver, which might resolve the display detection issue. Remember to back up any necessary data before proceeding with this step as it might cause changes in your settings.
Updating the Thunderbolt Controller Driver
An outdated Thunderbolt controller driver might prevent the proper functioning of the Thunderbolt port and cause display detection issues. You can resolve this by checking for driver updates from the manufacturer's website or through a trusted driver updater software like Outbyte Driver Updater. This tool could save considerable time by automatically downloading and installing these updates for you.
Applying a Registry Fix
If the problem still persists, you could consider applying a registry fix. This step involves modifying the Windows registry, which should be done with caution as wrong manipulation of registry settings could cause further issues on your computer. Only proceed with this step if you're comfortable working with the Windows registry.
Updating System BIOS
Last but not least, updating your system BIOS might also help resolve the Thunderbolt display detection issue. This step should be executed with caution since an incorrect BIOS update can cause significant problems. It's always advised to follow the manufacturer's instructions while performing this operation. An updated BIOS can offer improved compatibility and performance, potentially resolving the Thunderbolt display detection issue.
Detailed Explanation of Fixes
Let's explore in-depth how each of these fixes might help resolve the Thunderbolt display detection issue:
Process to Check the Cable
Begin by unplugging the Thunderbolt cable from your computer and the display. Inspect the cable for any visible damage, such as tears, fraying, or bent connectors. Try to connect the cable to a different laptop or use it with a different monitor to see if it works. You might also consider trying a different Thunderbolt-compatible cable to rule out the possibility of damaged wiring. If the problem persists with a new cord, the issue might be unrelated to the cable.
Steps to Perform a Power Cycle
Completing a power cycle is an easy task that can resolve a wide range of hardware detection issues. Here's how to do it:
- Turn off all your devices - your computer, the display, and any peripherals.
- Disconnect the power cord and other peripherals from these devices.
- Wait for about two to five minutes.
- Reconnect the power cord and turn your devices back on.
- Finally, reconnect your display to your laptop using the Thunderbolt cable.
This basic troubleshooting step can often solve minor connectivity problems.
Instructions to Roll Back Graphics Card Driver
If a recent update to your graphics card driver has caused compatibility issues with Thunderbolt display detection, you might want to roll back to the previous driver version. Here's how:
- Open the Device Manager on your computer.
- Expand the 'display adapters' branch. You should see several drivers - some for your laptop's display, and possibly others for external displays.
- Right-click on the graphics card driver related to your external display and select 'Properties'.
- In the Properties window, go to the 'Driver' tab.
- Click on 'Roll Back Driver', if the option is available.
Please keep in mind that you might need to download and install the older driver version manually from the manufacturer's official website if Windows doesn't keep a copy or the rollback option isn't available.
Process to Update Thunderbolt Controller Driver
By updating your system’s Thunderbolt controller driver, you ensure the most advanced and technically sound version of the software controls the interface between your computer hardware and the operating system. To update the Thunderbolt driver:
- Go to your laptop manufacturer's official website.
- Locate the drivers and downloads section. You'll typically find this under the support category.
- Locate the Thunderbolt software and driver packages for your particular device model.
- Download the driver package and run the installer; follow the on-screen instructions to complete the installation process.
Procedure to Apply a Registry Fix
A specific registry fix might help to resolve your Thunderbolt display detection issue. However, as previously warned, making changes to your Windows registry should only be done if you're comfortable with advanced system settings as incorrect edits can cause significant system issues. Before proceeding, ensure you have a current system backup in case you need to restore your settings.
If you're confident with proceeding, create a custom fix according to your particular issue. You can find numerous online guides for common registry corrections, but remember that each case can be unique so consider seeking professional advice if in doubt.
Guidance on Updating System BIOS
BIOS updates can multiply the effectiveness and compatibility of your system with newly released hardware and software; they can also solve issues caused by outdated firmware. The process involves:
- Verifying the current BIOS version of your system.
- Checking your manufacturer's official website for BIOS updates available for your specific model.
- Following the provided instructions carefully to initiate and complete the update process.
This task is best performed by experienced users or under professional guidance, as incorrect BIOS updates can cause substantial system damages.


