Table of Contents
Getting started with your new iPhone
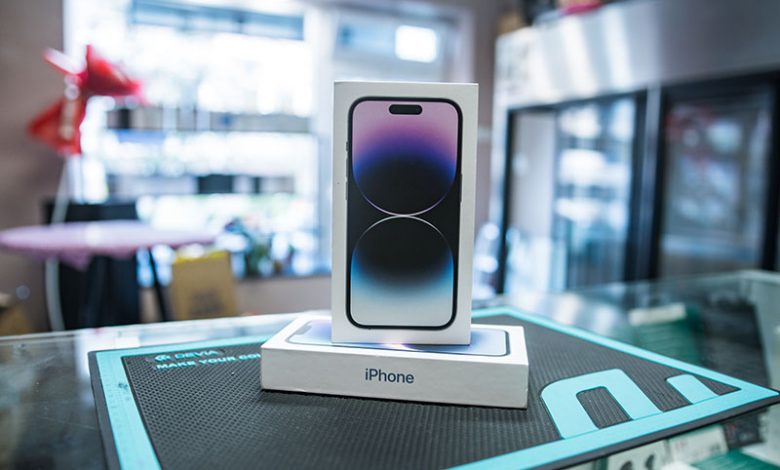
Setting up your new iPhone for the first time is an exciting venture. In order to get started with your new device, you will need to power it on. Press the button on the right-hand side of the iPhone until the Apple logo appears. Navigate through the initial setup screen language selection and region.
Set up manually if transferring from an Android phone
If you are transferring from an Android device, you have the option of manually setting up your new iPhone. Once your iPhone is powered on, you will begin with a manual setup on the 'Apps & Data' screen. From there, choose the 'Move Data from Android' option and then continue to set up your new iPhone following the on-screen instructions by entering your Apple ID and other settings preferences.
Allow devices to auto-detect each other if transferring from an old iPhone
For those transferring from an older iPhone, a more straightforward and seamless process awaits. The two devices should automatically detect each other and present you with a Quick Start screen. Acknowledge the action and follow the setup process as instructed. This includes entering your current iPhone passcode on the new iPhone.
Activating your cellular plan: eSIM and physical SIM cards
To activate your cellular plan, your iPhone will initiate the process automatically. If your carrier supports eSIM, I recommend adhering to the on-screen instructions to move your plan to the eSIM. This eliminates the need to physically change your SIM card and adds extra security against theft. However, if your carrier does not support eSIM or you are in a country that does not offer the service, you'll need to move the SIM card to your new device physically. A tool included in the iPhone box can assist with this. In case you face difficulties with this step, getting in touch with your cellular carrier is advised.
Setting up Face ID
Face ID offers a secure and convenient way to unlock your new iPhone and authorize purchases or app downloads. Setting up Face ID adds an extra level of convenience and security to your iPhone experience.
Set up Face ID using face scan
To set up Face ID on your iPhone, you'll be prompted during the initial setup process to scan your face. The setup procedure works a little like compass calibration. Instead of rolling your iPhone around, you roll your own head in different directions. You'll do this twice, and then the iPhone will store a 3D image of your head securely. If you've already set up your phone but want to set up Face ID later, head to Settings > Face ID & Passcode, input your password and start the process. Once completed, you can choose which features to use with Face ID in the same settings menu.
Capture facial detail for sunglasses or mask usage
If you often wear sunglasses or need to use a mask frequently, your iPhone can capture a more detailed scan of your face to include these accessories. A second face scan can be performed where it captures more detail around your eyes. This allows your iPhone to identify you accurately even with a mask on or sunglasses worn. Apple accommodates the changing needs of its users by providing an 'Alternate Appearance' feature. This feature allows for another face scan to be stored in cases where you sport a markedly different look regularly. The 'Alternate Appearance' feature can be accessed via Settings > Face ID & Passcode after initial setup.
Transferring your data
Transferring your data smoothly ensures that you maintain easy access to your apps, data, and personal settings without any disruption. Depending on your previous device and backup situation, there are different methods that can be used to efficiently transfer data to your new iPhone.
Option for first-time users: Don't Transfer Apps & Data
If you are a first-time smartphone user or you prefer to start afresh with your new iPhone, you can select the 'Don't Transfer Apps & Data' option during the initial setup process. This will allow you to set up your new iPhone without bringing over apps and data from a previous device.
Easiest way: Keeping old and new devices close for data transfer
When transferring data from an old iPhone, the easiest method is to keep both devices close together, allowing them to automatically detect each other for quick data transfer. A set of on-screen instructions will guide you through the entire process.
Transferring from an Android phone: Download Move to iOS app
If you are moving from Android to iOS, the MovetoiOS app is a useful tool that can alleviate the transfer process. Simply download this app on your Android phone and follow the on-screen instructions to move data from Android to your new iPhone.
If old phone is no longer functional: Restore from iCloud Backup
If your old phone is no longer available or functional, or if you encounter problems with the Quick Start option, you can restore your new iPhone from an iCloud backup. On the 'Transfer Your Apps and Data page' during setup, choose 'from iCloud Backup'. Logging in to your Apple ID and verifying with a code sent to a separate device as part of Apple's two-factor authentication will be required eventually.''
Enabling Apple Services and Additional Settings
Apple provides an array of services that enhance user experience on the iPhone. To enjoy all the functionalities the iPhone offers, there are a few additional settings that you should take a moment to enable during the initial setup.
Signing in with your Apple ID
Your Apple ID is the backbone of your iPhone experience, as it enables access to essential features and services. During setup, you'll be prompted to sign in to your Apple ID. In case you don't remember your password or don't have an account, tap 'Forgot password or don't have an Apple ID?' and follow the prompts to retrieve or create an account.
Turning on iMessage, FaceTime, and Location Services
The setup process will prompt you to turn on iMessage and FaceTime, important features for communication on your iPhone. You should also turn on Location Services to enable location-based functionality such as local weather and geographical photo tagging. Analytics sending to Apple can be opted out if you wish.
Setting up Siri and ApplePay
During setup, don't skip setting up 'Hey Siri' to enable voice command functionality. If you have your cards handy, setting up Apple Pay would be convenient, but this can also be done later via the Wallet app if you choose to postpone it.
Enabling iCloud Keychain and Screen Time
During setup, you'll be prompt to turn on iCloud Keychain, an integrated secure password manager that synchronizes across all your Apple devices. A recommended feature to grace your iPhone usage is Screen Time, which helps track and manage screen usage time for a healthier digital life.
Adjusting Display Zoom for readability
If you're having difficulty reading small text on your iPhone, you can adjust the Display Zoom setting to scale up everything on your iPhone's screen for better readability.
Additional guidance for first-time iPhone users
Getting accustomed to a new device especially for a first-time user can be a little overwhelming. But Apple ensures a smooth transition by providing both extensive and simple on-screen instructions during the initial setup. Each step is designed to configure your iPhone optimally according to your preference.

